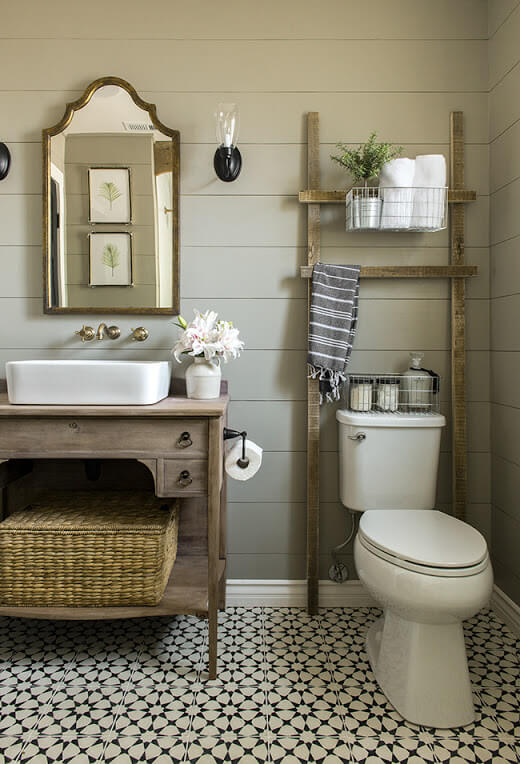
The realm of bathroom decoration need not be confined to high-end purchases and professional services. Enter the realm of DIY delights, where creativity meets frugality, allowing you to transform your bathroom into a personalized haven without breaking the bank. In this compilation, we present a curated collection of do-it-yourself bathroom decor projects—each with step-by-step instructions, required materials, and insider tips to infuse your bathroom space with charm on a budget.
1. Pallet Wood Wall Accent: Rustic Elegance Unveiled
Materials Needed:
- Pallet wood panels
- Sandpaper
- Wood stain or paint
- Nails and a hammer or a nail gun
- Level
- Saw (if resizing pallet panels)
Instructions:
- Prepare the Pallet Wood: Sand the pallet wood panels to smooth out any rough edges.
- Apply Stain or Paint: Choose a wood stain for a rustic look or paint for a more contemporary feel. Apply the chosen finish evenly and let it dry.
- Arrange Panels: Determine the desired arrangement of pallet wood panels on the chosen wall. Use a level to ensure straight alignment.
- Secure Panels: Nail the panels to the wall securely, making sure they are evenly spaced.
- Personalization Tip: Add hooks or shelves to certain panels for functional and aesthetic appeal. Use this accent wall to hang towels, mirrors, or small potted plants.
2. Mason Jar Storage: Vintage Chic Organization
Materials Needed:
- Mason jars
- Pipe clamps
- Screws
- A piece of wood or a reclaimed pallet
- Screwdriver
- Stain or paint (optional)
Instructions:
- Prepare the Wood: If using a reclaimed pallet, sand it and apply stain or paint if desired.
- Attach Pipe Clamps: Secure pipe clamps to the wood using screws. Ensure they are evenly spaced.
- Insert Mason Jars: Slide mason jars into the pipe clamps, securing them in place. Make sure they are snug but not too tight.
- Mount on the Wall: Hang the wooden board with attached mason jars on the bathroom wall using screws.
- Personalization Tip: Paint the pipe clamps for a pop of color or coordinate with your bathroom decor. Use this charming storage solution for items like toothbrushes, cotton swabs, or small bathroom accessories.
3. Rope Towel Holder: Nautical Elegance Unleashed
Materials Needed:
- Thick rope
- Two large eye screws
- Drill
- Wall anchors (if necessary)
- Metal ring or carabiner
Instructions:
- Prepare the Rope: Cut the rope to the desired length, considering how low you want the towels to hang.
- Secure Eye Screws: Drill two large eye screws into the bathroom wall at the chosen height.
- Thread the Rope: Thread the rope through the eye screws, creating a hanging loop.
- Tie a Knot: Tie a secure knot at each end of the rope to prevent fraying.
- Attach Towels: Fold and hang towels through the loop or use a metal ring or carabiner to easily switch towels.
- Personalization Tip: Choose a colored or patterned rope for a touch of flair. Consider adding decorative knots for an extra element of style.
4. Framed Mirror Upgrade: Artistic Reflections
Materials Needed:
- Plain framed mirror
- Mosaic tiles or self-adhesive backsplash tiles
- Tile adhesive
- Grout
- Sponge or cloth
- Tile spacers (if using small tiles)
Instructions:
- Prepare the Mirror: Clean the surface of the framed mirror thoroughly.
- Tile Placement: Apply tile adhesive to the mirror frame and carefully place mosaic tiles or self-adhesive backsplash tiles.
- Grouting: Once the adhesive has dried, apply grout between the tiles using a sponge or cloth. Wipe away excess grout.
- Drying Time: Allow the grout to dry completely before cleaning any remaining haze on the tiles.
- Personalization Tip: Choose tiles that complement your bathroom color scheme or experiment with a mix of vibrant hues. This DIY project adds an artistic touch to your mirror, turning it into a focal point.
5. Fabric-Covered Storage Boxes: Chic Organization Solutions
Materials Needed:
- Cardboard or wooden storage boxes
- Fabric of choice
- Mod Podge or fabric glue
- Scissors
- Paintbrush
Instructions:
- Cut Fabric Pieces: Measure and cut fabric pieces to cover each side of the storage boxes.
- Apply Adhesive: Use Mod Podge or fabric glue to apply a thin layer on one side of the box.
- Attach Fabric: Carefully press the fabric onto the glued surface, smoothing out any wrinkles or bubbles.
- Repeat: Repeat the process for each side of the box, ensuring a cohesive look.
- Allow to Dry: Let the boxes dry completely before using them for storage.
- Personalization Tip: Mix and match fabrics for a playful aesthetic. Label each box for easy organization of bathroom essentials.
6. Floating Shelves from Crates: Stylish Storage Upgrade
Materials Needed:
- Wooden crates
- Sandpaper
- Stain or paint
- Screws
- Wall anchors
- Level
Instructions:
- Prepare the Crates: Sand the wooden crates to smooth any rough edges.
- Apply Stain or Paint: Choose a stain or paint that complements your bathroom decor. Apply the finish evenly and let it dry.
- Arrange Crates: Determine the desired arrangement of the crates on the wall. Use a level to ensure straight alignment.
- Secure to Wall: Secure the crates to the wall using screws and wall anchors for stability.
- Personalization Tip: Add decorative items, such as small potted plants or scented candles, to the floating shelves for an extra touch of charm. Paint the crates in contrasting colors for a bold statement.
In the realm of DIY delights, these projects pave the way for a bathroom transformation that marries creativity and budget-consciousness. Embark on these ventures, armed with the satisfaction of crafting a space uniquely yours—one that reflects your style, ingenuity, and the joy of personalized decor.
